Table of Contents
Quick Answer
Gym equipment spacing decisions require a structured evaluation of clear space around fixed, movable, and powered fitness equipment against user needs, operating conditions, facility constraints, documentation, service, and acceptance requirements. For gym planners, architects, operations teams, and equipment buyers, the immediate objective is to document usable clearances before equipment positions are approved. Start with a written brief, compare evidence for the exact model or process, and close every exception before approval.
This guide treats gym equipment spacing planning as a practical commercial decision rather than a marketing exercise. It does not replace model instructions, qualified technical advice, or the laws and standards that apply in a particular location. It gives project teams a repeatable method for asking better questions and preserving workable records.

Translate the Business Goal Into Site Requirements
For gym planners, architects, operations teams, and equipment buyers, gym equipment spacing starts by translating the operating concept into a room brief. The project group is planning clear space around fixed, movable, and powered fitness equipment, with the specific aim to document usable clearances before equipment positions are approved. Capture target users, peak occupancy, supervised and unsupervised activities, opening hours, and the training experiences the facility intends to support.
These inputs give gym equipment spacing a reason for every zone and equipment position. They also reveal conflicts early: a floor designed for fast member turnover will not be arranged in the same way as a coached strength studio. Use the commercial fitness equipment range to identify likely equipment families, then test them against the site rather than forcing the site around a catalog.
Measure the Room and the Operating Envelopes
Accurate gym equipment spacing uses verified site dimensions, not only a marketing floor plan. Confirm columns, doors, windows, ceiling changes, slopes, drains, floor transitions, fixed services, and areas that cannot carry equipment. Mark any dimension that still needs site verification.
For equipment, draw both the static footprint and the operating envelope. The latter includes users entering and leaving, moving arms, plates, benches, cable travel, open covers, and technician positions. Our commercial gym equipment buying guide shows why the usable area around strength machines matters as much as the frame dimensions during gym equipment spacing.
Design Circulation Around Real Use
Circulation in gym equipment spacing must remain understandable when the facility is busy. Trace a first-time member from reception to orientation, warm-up, strength or cardio zones, storage, and exit. Then repeat the exercise for staff carrying cleaning supplies, a technician moving tools, and installers replacing a large machine.
Do not count an exercise area as a walkway simply because it is empty on the drawing. Routes must not pass through plate loading positions, behind moving cardio equipment, or across a functional cable path. The 2010 ADA Standards for Accessible Design is an critical official reference for U.S. accessibility planning; other jurisdictions require their own evaluation.
Coordinate the Six Critical Planning Inputs
A coordinated gym equipment spacing evaluation brings equipment, architecture, engineering, and operations into the same conversation. Work through these inputs before approving positions or issuing installation drawings:
- manufacturer footprint and the maximum moving envelope.
- user entry, exit, adjustment, loading, unloading, and spotting positions.
- circulation routes that remain open during peak activity.
- accessible routes, transfer needs, and local design requirements.
- cleaning, inspection, service-panel, and replacement access.
- plate trees, benches, attachments, waste bins, and other movable obstructions.
Each input needs a source, an owner, and a status. During gym equipment spacing, label information as verified, provisional, or requiring action. That simple discipline prevents a provisional model or assumed utility point from quietly becoming a construction decision.
Coordinate Power, Ventilation, Lighting, and Acoustics
Building services can make or break gym equipment spacing. Powered cardio equipment needs model-specific electrical information and protected cord routes. Heat-producing equipment and busy zones influence ventilation. Lighting must support instructions and supervision without glare on displays, while acoustic treatment must reflect impacts, vibration, music, and neighboring occupancies.
Qualified designers must determine the requirements that apply to a particular project. The ISO 20957-1:2024 overview is one official source for general electrical requirements in the United States, but it is not a substitute for local design. Freeze outlet positions only after the equipment schedule and gym equipment spacing drawing are coordinated.
Plan Delivery, Installation, Cleaning, and Service Access
Good gym equipment spacing considers the full ownership path. Check whether crates and components can reach the room, whether the finished floor can be protected, and where installers can stage parts without blocking the building. Identify anchoring, leveling, commissioning, and removal responsibilities.
After opening, staff need room to clean around feet and frames, inspect wear points, reach guards, and isolate equipment. Technicians may need to open covers or move adjacent items. Connect the drawing to the functional trainer guide so maintenance access remains visible throughout gym equipment spacing.

Test Peak-Time and Change Scenarios
A static drawing cannot prove that gym equipment spacing works. Run short scenarios: several members arrive at the same popular station, a coach demonstrates a movement, an attachment is left out, a bench is moved, a treadmill is isolated, or a cleaning cart enters the zone. Establish what blocks, who notices, and how the route is restored.
- measuring frame-to-frame distance while arms or plates extend further.
- letting a movable bench become part of an assumed clear route.
- placing service panels against walls.
- compressing popular equipment into a visually tidy but operationally crowded row.
These risks are easier to correct during gym equipment spacing than after installation. Where the answer depends on a movable object or staff habit, add a storage location, floor rule, operating procedure, or supervision responsibility rather than assuming the space will manage itself.
Compare Layout Options on the Same Basis
Compare gym equipment spacing options with the same room boundary, equipment schedule, and assumptions. A concept that appears to fit more machines may perform worse if it creates queues, hides sightlines, restricts accessible routes, or prevents service access.
| Evaluate area | Evidence or planning input | Decision question |
|---|---|---|
| Plate-loaded machine | Moving arms, plates, storage horns, loading stance | No plate handling in a circulation path |
| Selectorized station | Entry, adjustments, stack guard, technician access | Users can set up without crossing another station |
| Treadmill | Power, side access, rear area, ventilation, service panels | Cords and dismount area remain controlled |
| Functional trainer | Cable reach, attachments, exercise radius, nearby users | Simultaneous movements do not conflict |
Capture why the preferred gym equipment spacing option supports the operating brief. Keep rejected options when they document an critical constraint; they can prevent the same unsuitable idea from returning later without context.
Field Notes for Gym Equipment Spacing
The following field notes turn gym equipment spacing into a evaluation sequence for this specific topic. They are deliberately practical: each note identifies what to verify, what to evidence file, and what decision the evidence must support. Adapt the sequence to the applicable model instructions, site, and jurisdiction.
Establish the baseline by reviewing manufacturer footprint and the maximum moving envelope. Name the source of the information, the person who verified it, and the revision or date. If the input is provisional, show the condition that must be satisfied before approval.
Confirm user entry, exit, adjustment, loading, unloading, and spotting positions. Observe the actual condition or obtain model-specific evidence instead of relying on a family description. Capture any limit that affects users, layout, service, or acceptance.
Test the proposal against circulation routes that remain open during peak activity. Establish operations staff how this will work during a busy period and establish technical staff how it will be inspected. An answer that depends on an informal workaround needs a controlled action.
Assign responsibility for accessible routes, transfer needs, and local design requirements. The project evidence file must state who supplies the information, who reviews it, who performs the work, and who confirms completion. This prevents critical tasks from disappearing between supplier, installer, and operator.
Preserve evidence for cleaning, inspection, service-panel, and replacement access. Useful evidence may include a drawing, manual section, photograph, inspection entry, supplier clarification, or signed acceptance item. Keep it with the asset or project file so later teams can understand the decision.
Close the evaluation with plate trees, benches, attachments, waste bins, and other movable obstructions. Compare the result with the original operating need and note any exception. If the facility cannot maintain the requirement after opening, revise the choice or the operating plan before handover.
The same discipline applies to warning signs. Do not merely list a concern; describe its likely consequence, the immediate control, the evidence needed for closure, and the person authorized to approve the result.
Treat measuring frame-to-frame distance while arms or plates extend further as an evidence gap. Pause the affected decision, identify the missing evidence file, and keep the item open until the proposed control can be checked.
When you find letting a movable bench become part of an assumed clear route, compare the proposal with the approved brief. The response may require clarification, a layout or scope change, competent assessment, or rejection of the option.
If the evaluation reveals placing service panels against walls, document who is exposed to the consequence and when it could occur. That context helps the project group assign priority without exaggerating the claim.
Prevent recurrence of compressing popular equipment into a visually tidy but operationally crowded row by updating the specification, checklist, drawing, training note, or acceptance form that allowed the gap to pass unnoticed.
These notes make gym equipment spacing easier to hand over because the final file explains both the decision and the operating assumptions behind it. Evaluate the notes again after installation, a major service event, relocation, or a change in facility use.
Control Drawings and Late Changes
Once gym equipment spacing reaches approval, assign a drawing revision and link it to the equipment schedule. A model substitution can change dimensions, power, moving envelopes, anchor positions, and service access even when the exercise looks similar. Require a coordinated evaluation before accepting the change.
The HSE work equipment inspection guidance reinforces the value of considering instructions, risk, and operating experience when planning inspections. Preserve those inputs in the gym equipment spacing evidence file, and issue an updated plan to installers, operations staff, and service providers when positions change.
Approve a Floor Brief That Operations Can Use
Finish gym equipment spacing with more than a presentation image. The approved package must include the room plan, equipment schedule, operating envelopes, utility information, storage, accessibility notes, installation responsibilities, service access, and a list of open actions.
Walk the finished space before acceptance and compare it with the approved gym equipment spacing plan. Confirm positions, routes, clearances, connections, labels, and storage in actual use. Evaluate the relevant official context in OSHA electrical standards, and for model and project questions, commercial treadmill guide before equipment is released for routine member access.
Frequently Asked Questions
What must a gym equipment spacing checklist include?
A gym equipment spacing checklist must cover the exact scope, intended users, operating environment, model or asset identity, facility interfaces, inspection and service needs, documents, responsibilities, acceptance evidence, and open actions.
Who must be involved in gym equipment spacing?
Include the buyer or owner, facility operations, trainers or user representatives, technical advisers, installers, and service personnel as relevant. gym equipment spacing works best when each person reviews the decisions they will later own.
How early must gym equipment spacing begin?
Begin gym equipment spacing before models or positions are fixed. Early evaluation allows the project group to coordinate clear space around fixed, movable, and powered fitness equipment with the floor, utilities, access, service plan, documents, and project schedule while changes are still manageable.
Which documents support gym equipment spacing?
Use controlled specifications, drawings, manuals, inspection criteria, parts information, warranty terms, supplier clarifications, site drawings, installation records, and acceptance forms. Keep the revision and model identity visible.
What is the main outcome of gym equipment spacing?
The main outcome is a documented decision that helps the project group document usable clearances before equipment positions are approved. It must show what was approved, why it is suitable, who is responsible, and how the result will be checked.
Next Step
Effective gym equipment spacing turns a broad intention into a controlled brief, comparable evidence, and an acceptance evidence file. Keep the user, operating environment, facility interface, maintenance plan, and responsible organizations visible from the first evaluation through handover.
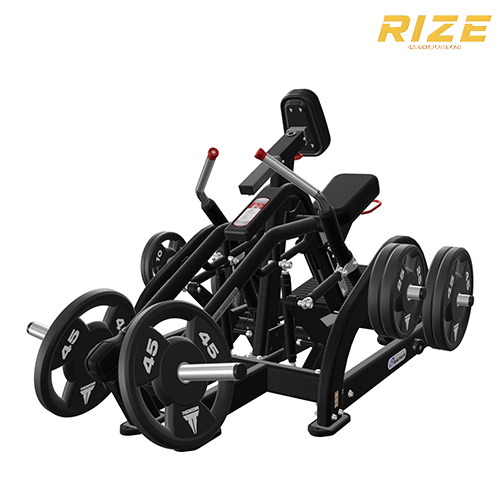
If you are planning a new facility, replacement program, or distributor project, share your equipment schedule, floor plan, target users, and service requirements with Rize Sport. The project group can help you compare appropriate configurations and provide model information for your gym equipment spacing evaluation.